Android SeekBar
Android SeekBar can be defined as below –
"SeekBar is an extension of ProgressBar which adds a draggable thumb, a user can touch the thumb and drag left or right to set the value for current progress value. SeekBar is one of the very useful user interface elements in Android that allows the selection of integer values using a natural user interface. An example of SeekBar is the brightness control and volume control of your device."
Android SeekBar class are the sub classes of AbsSeekBar.
Attributes of Android SeekBar
Some of the popular attributes of android seekbar that can be used to customise this seekbar are –
| S. No. | XML Attributes | Description |
| 1 | android:id | Set id of the view. |
| 2 | android:background | Set background of the view. |
| 3 | android:clickable | Set whether view is clickable or not. |
| 4 | android:elevation | Sets base z-depth of the view. |
| 5 | android:thumb | It draws a thumb on seekbar. |
Some of the popular attributes of android SeekBar inherited from AbsSeekBar are –
| S. No. | XML Attributes | Description |
| 1 | android:thumbTint | Tint to apply on drawable of thumb. |
| 2 | android:thumbTintMode | Blending mode used to apply the thumb tint. |
| 3 | android:tickMarkTint | Tint to apply on tick mark drawable. |
| 4 | android:tickMarkTintMode | Blending mode used to apply the tick mark tint. |
Some of the popular attributes of android SeekBar inherited from ProgressBar are –
| S. No. | XML Attributes | Description |
| 1 | android:max | It defines the maximum value. |
| 2 | android:min | It defines the minimum value. |
| 3 | android:progress | It defines the default progress value (between 0 and max value). |
| 4 | android:progressDrawable | It defines drawable of the progress mode. |
At first, we will create android application. Then, we will use seekBar in this application.
Follow the steps below to create new project. Please ignore the steps if you've already created an application.
| S. No. | Steps |
| 1 | Open Android Studio. |
| 2 | Go to File => New => New Project. Write application name as SeekBar. Then, click next button. |
| 3 | Select minimum SDK you need. However, we have selected 14 as minimum SDK. Then, click next button. |
| 4 | Then, select Empty Activity => click next => click finish. |
| 5 | If you have followed above process correctly, you will get a newly created project successfully. However, you can also visit tutorial to Create a New Project to know steps in detail. |
Now, we'll modify xml and java file to use seekBar in the project.
Modify Values folder
Open res/layout/activity_main.xml file. Then, add below code into it.
<resources>
<string name="app_name">SeekBar</string>
</resources>
SeekBar in xml file
Open res/layout/activity_main.xml file. Then, add below code into it.
<?xml version="1.0" encoding="utf-8"?>
<android.support.constraint.ConstraintLayout xmlns:android="http://schemas.android.com/apk/res/android"
xmlns:app="http://schemas.android.com/apk/res-auto"
xmlns:tools="http://schemas.android.com/tools"
android:layout_width="match_parent"
android:layout_height="match_parent"
tools:context=".MainActivity">

<SeekBar
android:id="@+id/seekBar"
android:layout_width="match_parent"
android:layout_height="wrap_content"
app:layout_constraintBottom_toBottomOf="parent"
app:layout_constraintLeft_toLeftOf="parent"
app:layout_constraintRight_toRightOf="parent"
app:layout_constraintTop_toTopOf="parent" />

</android.support.constraint.ConstraintLayout>
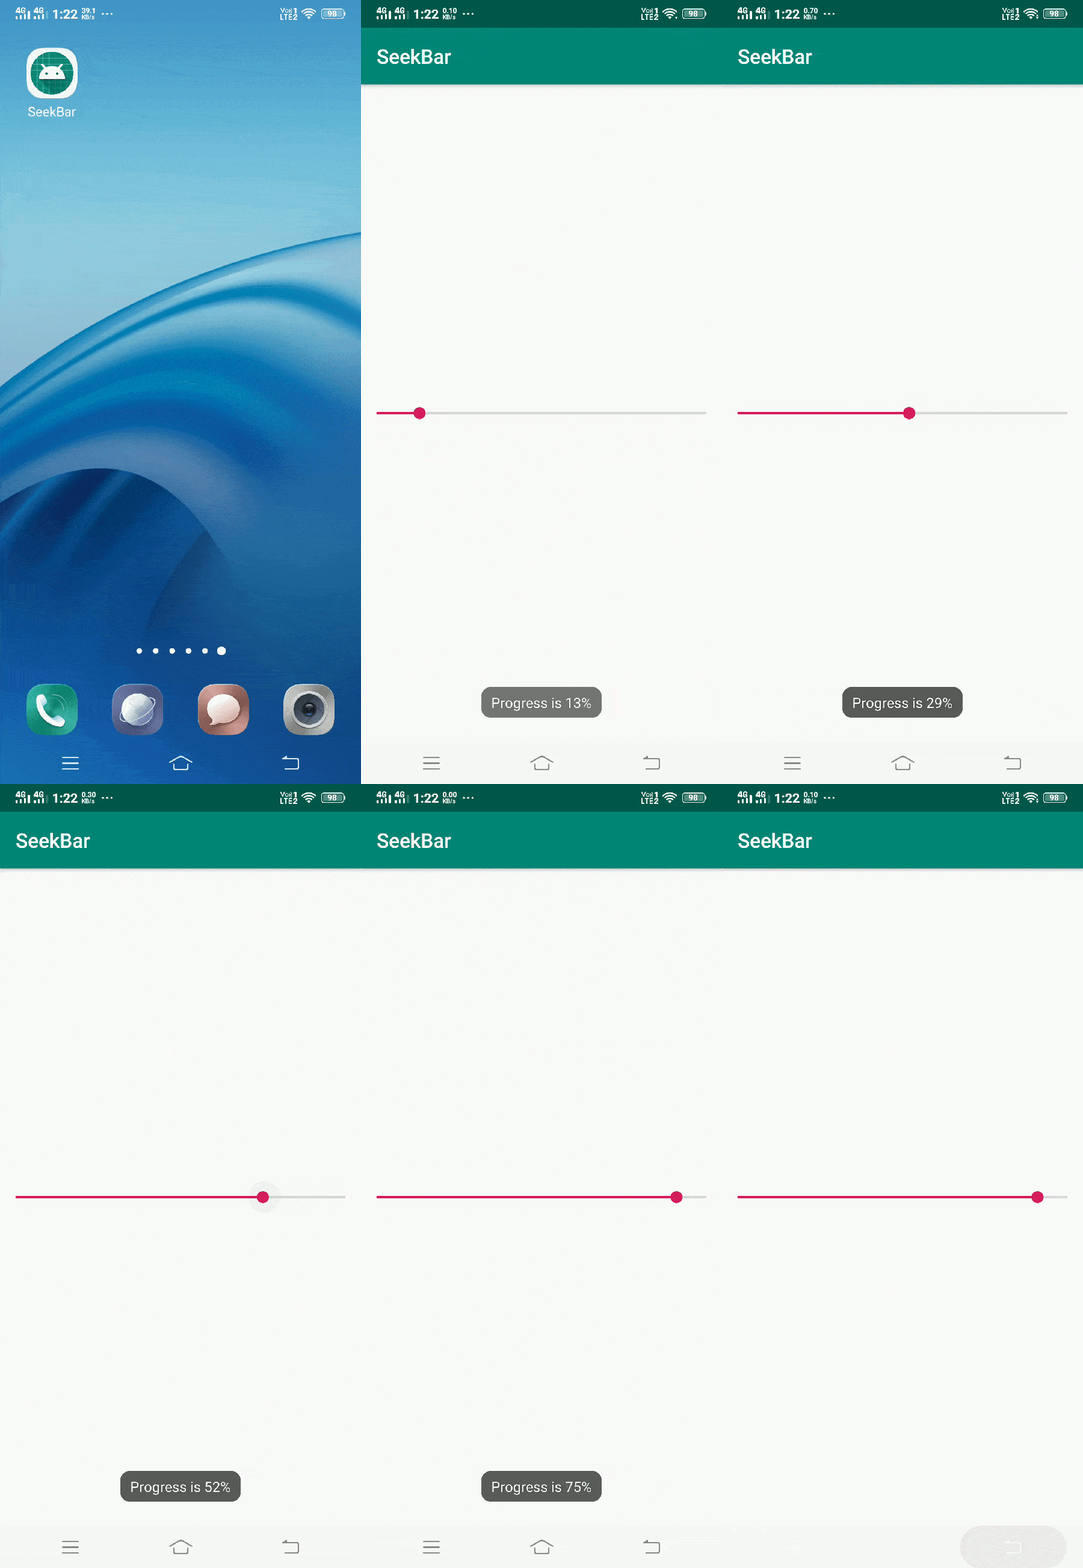
In activity_main.xml file, we have used seekBar widget. Now, we'll access this seekBar into java file. We also, display a toast message whenever thumb moves back and forth that displays the seekBar's current progress.
SeekBar in java file
Open src/main/java/com.ukacademe.seekbar/MainActivity.java file. Then, add below code into it.
package com.ukacademe.seekbar;

import android.support.v7.app.AppCompatActivity;
import android.os.Bundle;
import android.widget.SeekBar;
import android.widget.Toast;

public class MainActivity extends AppCompatActivity {

    @Override
    protected void onCreate(Bundle savedInstanceState) {
        super.onCreate(savedInstanceState);
        setContentView(R.layout.activity_main);
        SeekBar seekBar = findViewById(R.id.seekBar);
        if (seekBar != null) {
            seekBar.setOnSeekBarChangeListener(new SeekBar.OnSeekBarChangeListener() {
                @Override
                public void onProgressChanged(SeekBar seekBar, int progress, boolean fromUser) {
                    // Write code to perform some action when progress is changed.
                }

                @Override
                public void onStartTrackingTouch(SeekBar seekBar) {
                    // Write code to perform some action when touch is started.
                }

                @Override
                public void onStopTrackingTouch(SeekBar seekBar) {
                    // Write code to perform some action when touch is stopped.
                    Toast.makeText(MainActivity.this, "Progress is " + seekBar.getProgress() + "%", Toast.LENGTH_SHORT).show();
                }
            });
        }

    }
}
Since the file of AndroidManifest.xml is very important in any android application. We are also going to mention it here.
AndroidManifest.xml
Code inside src/main/AndroidManifest.xml file is as below –
<?xml version="1.0" encoding="utf-8"?>
<manifest xmlns:android="http://schemas.android.com/apk/res/android"
package="com.ukacademe.seekbar">

<application android:allowBackup="true"
android:icon="@mipmap/ic_launcher"
android:label="@string/app_name"
android:roundIcon="@mipmap/ic_launcher_round"
android:supportsRtl="true"
android:theme="@style/AppTheme">
<activity android:name=".MainActivity">
<intent-filter>
<action android:name="android.intent.action.MAIN" />

<category android:name="android.intent.category.LAUNCHER" />
</intent-filter>
</activity>
</application>

</manifest>
When you run the program, you will get output as shown below.
Output

